Denoising - Arnold for Houdini HtoA
2 years agoI love Houdini on my Mac M2 chip and Arnold is one of the fastest rendering engines I’ve been using so far. I think I’m gonna stick to only 2 rendering engines long term — and that’s Arnold and Redshift. Both are reliable depending on your scene.
Now, let’s talk about NOICE.
It's been days since I've been trying to figure out how to make the Arnold Denoiser in Houdini work. There's been little to no detailed documentation about it — at least I only found how to set up the AOVs.
The problem is, every time I render the EXR output, I get knocked down with the error:
Required metadata not found, check that the image was rendered directly with Arnold.
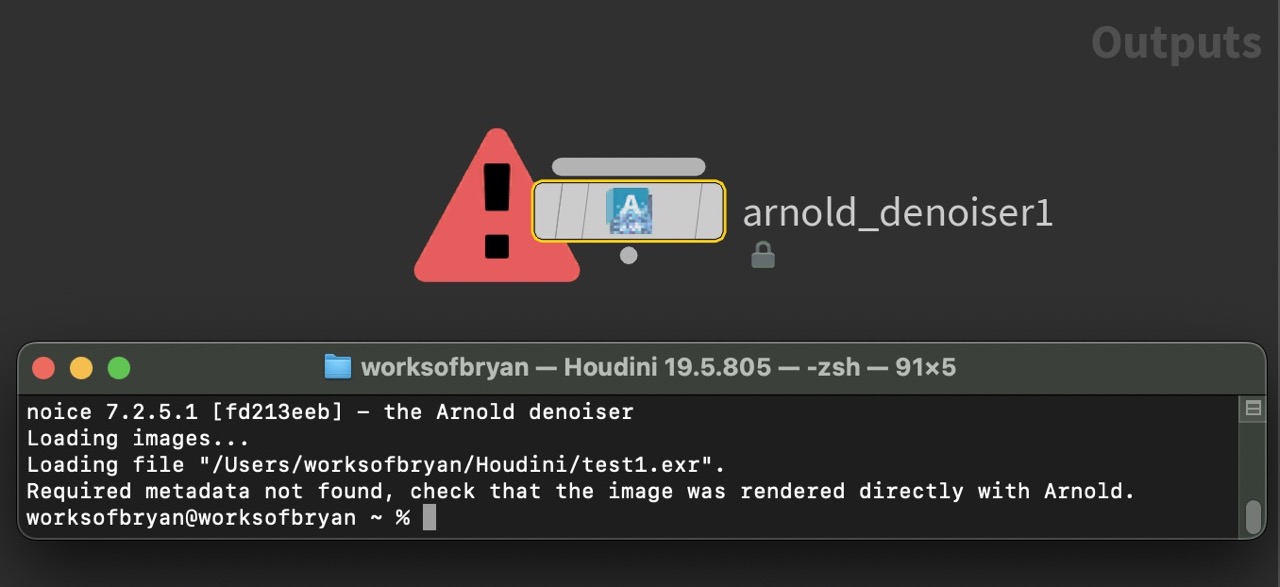
Got my AOVs output correctly. So what I've been doing wrong?
I figured. First of all, Arnold Denoiser NOICE is a standalone tool. It means, you need to render your image first with variance AOVs enabled. I easily fell into the trap of rendering via MPlay or the Render View - coz that’s what you should do, right?
Wrong.
The only way to get the multi-layered AOV output with metadata is to render using the Arnold EXR driver. This is key! But how do you do that?
So if you’re like me and you end up here, you might just finally get your nice denoised renders in Arnold. Follow through…
In your Arnold setting, tick the Output Variance AOV with image format as OpenEXR.
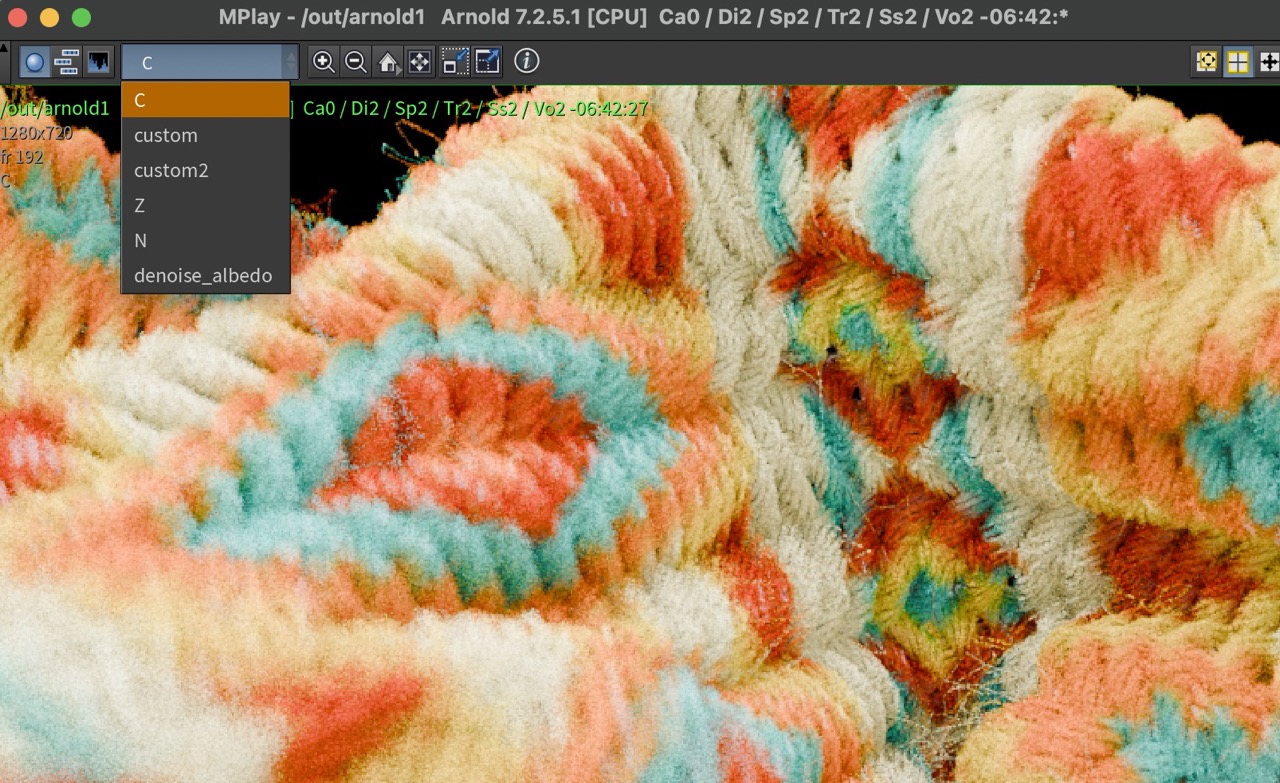
Now, THIS IS IMPORTANT: Make sure to save your rendered image files NOT via MPlay but selecting the option "Sequence of .exr files" as shown below:

Add your AOVs. I used custom AOV with Light Path expression C[DSV]L and another set with Pixel Filter as variance.

Hit the Render button.
Nope, you won’t get a view of the rendering image in process. If you render in sequence, the familiar render image sequence window should pop-up and show the progress.
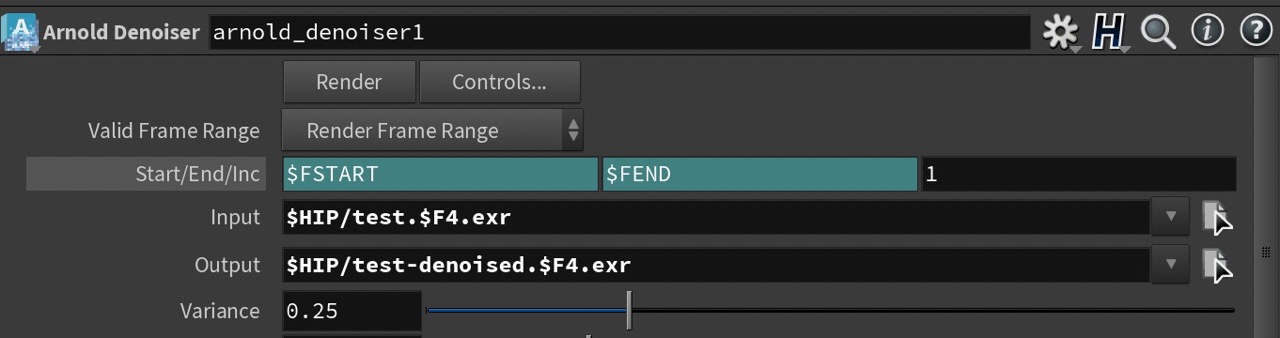
Now that you have your EXR image rendered multi-layered with the AOVs, drop your Arnold Denoiser node with the settings to include the EXR image, an output filename and your custom light group AOVs included. Hit the Render button.
Voila!
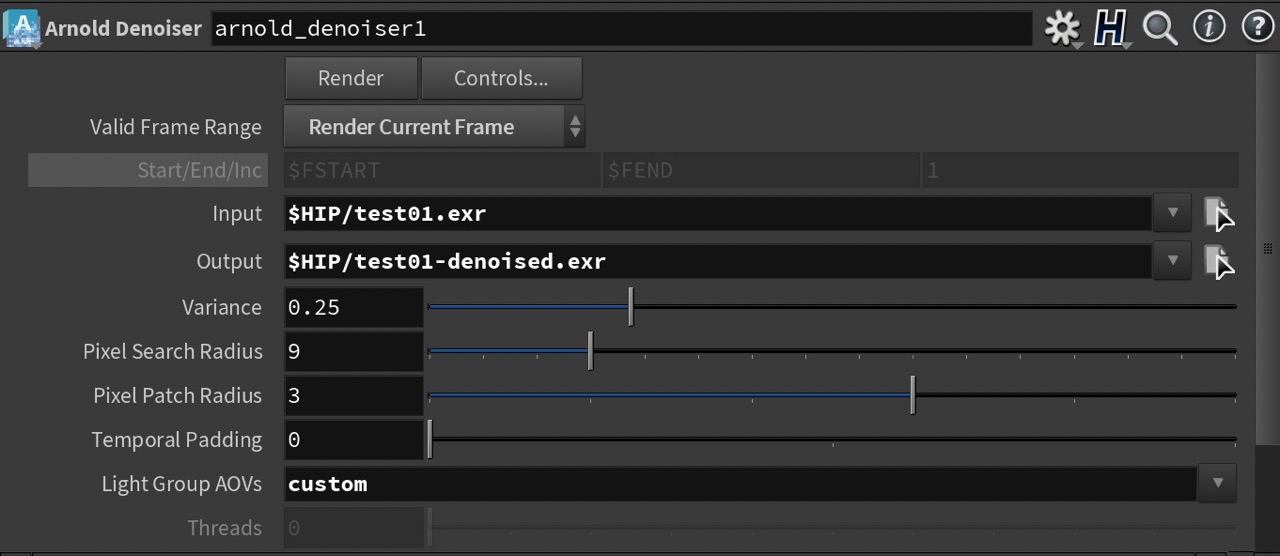
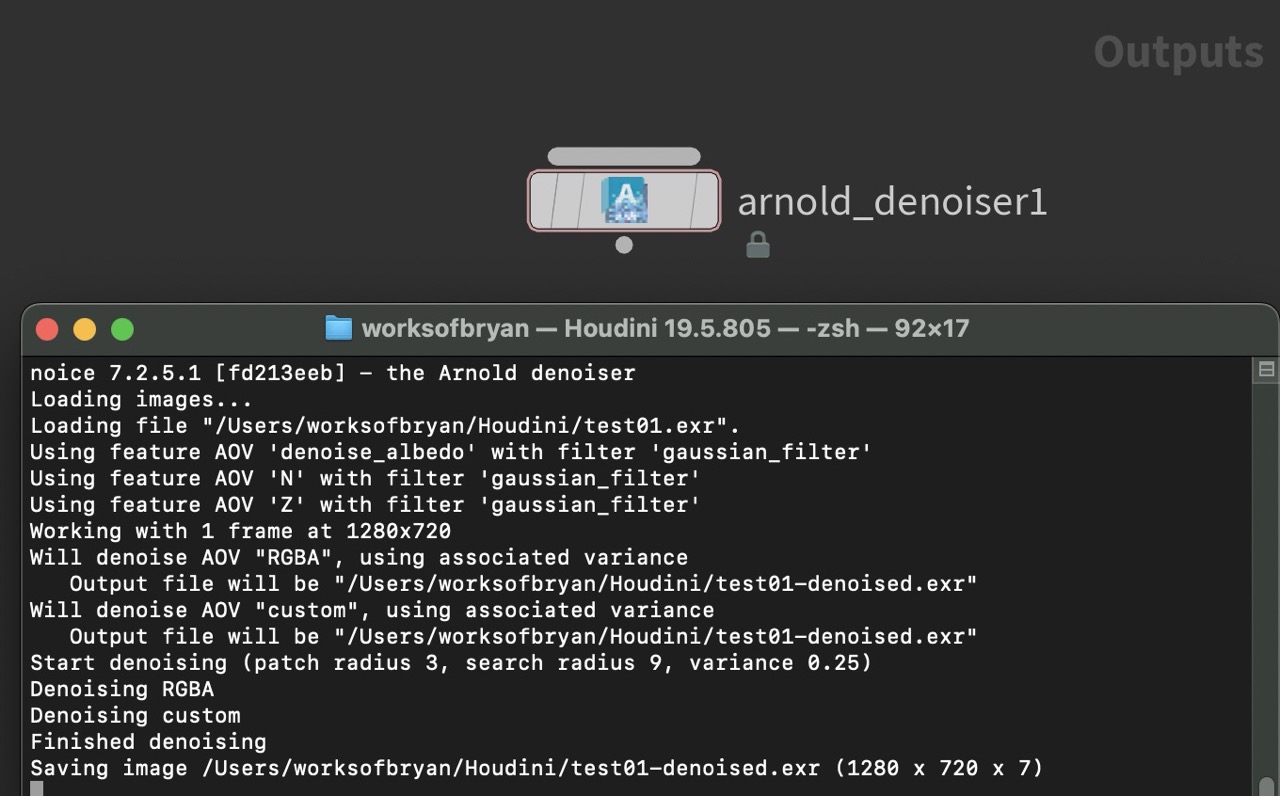
Bonus Tip! You can also render a full frame range and denoice them post-render using the standard Houdini file naming convention i.e. $F4
Or, even run Arnold’s NOICE directly via a command prompt by specifying the location of your Arnold NOICE, rendered EXR as input, an output filename and your AOV custom settings:
noice -i /Users/worksofbryan/test16.exr -o /Users/worksofbryan/test16-denoised.exr -ef 0 -sr 9 -pr 3 -v 0.5 -l custom
Happy DENOISING!
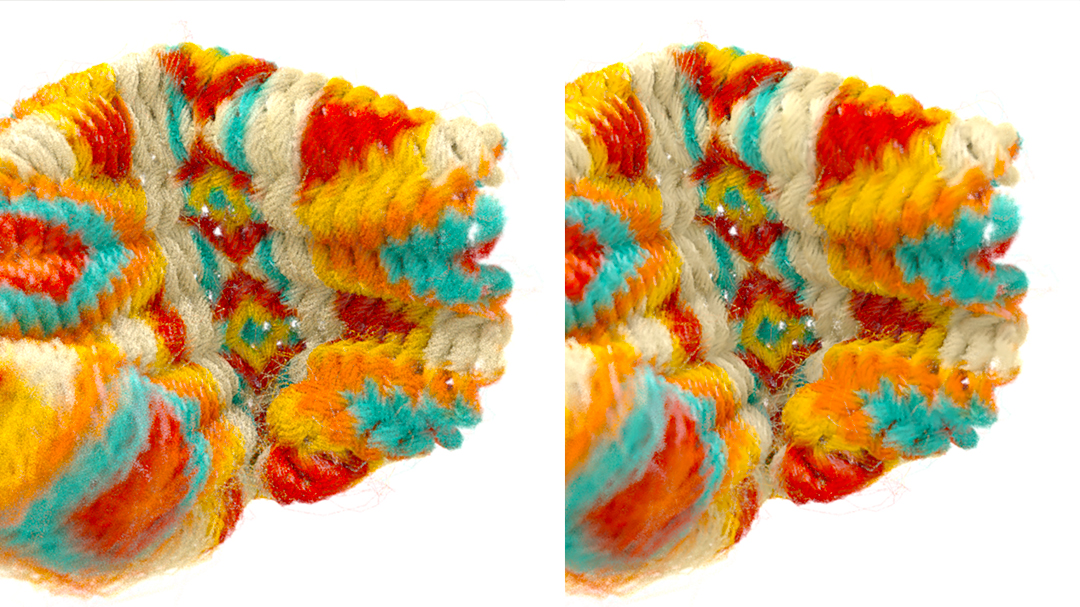
Kumusta Ka?
Hi there. How do you like this artwork? I'd love to hear from you. Please drop me a note...
Thanks!
Fancy a bit more of my digital artwork? Just follow me on instagram at @worksofbryan Or, get a quote today!!